De 4th classical style of lighting is Loop lighting.
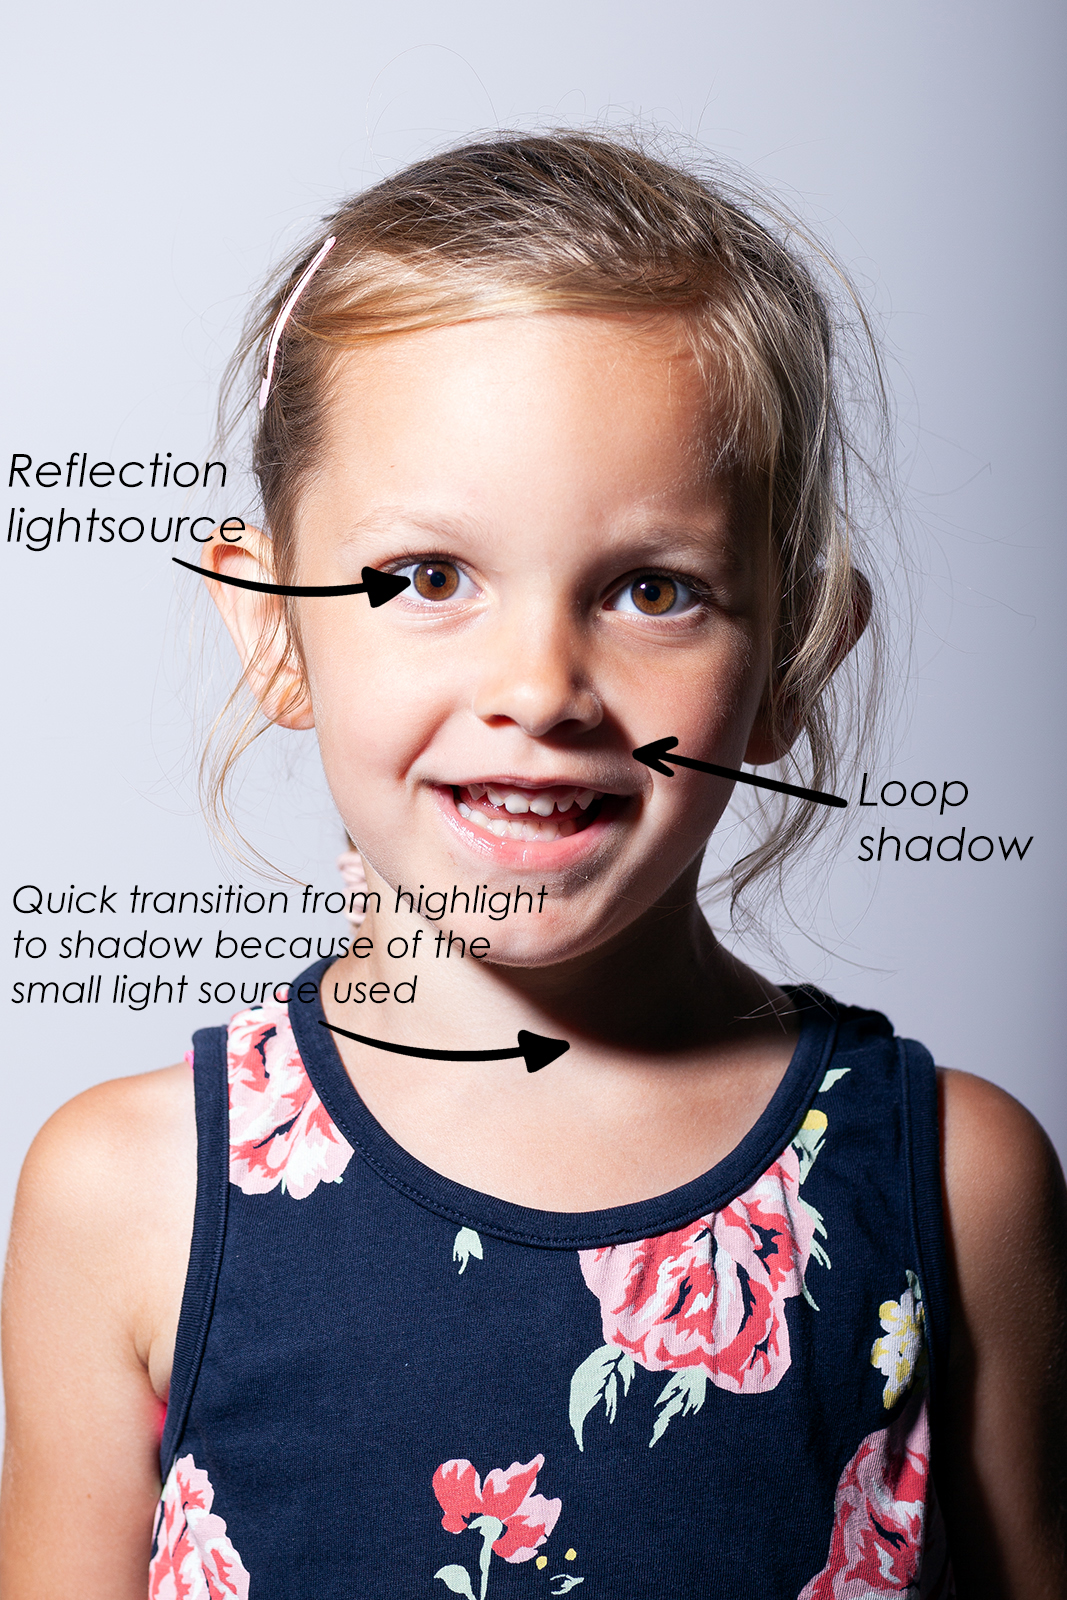
Loop lighting s, just as Butterfly lighting, named after the shadow that the light pattern creates on the face. When done properly, Loop lighting creates a circle just below and on the side of the nose (a ‘Loop’). The size and shape of the Loop can vary, depending on your lightsource.
Loop lighting looks a lot like Rembrandt lighting, only with Loop the shadow of the nose is not attached to the shadow of the cheekbone. Closing this shadow creates the triangle of light on the cheek that we see with Rembrandt lighting.
Loop lighting is a pattern of light that can be used for almost every model. It is less dramatic than Rembrandt and Split, but gives just a bit more tension than Butterfly or Flat lighting.
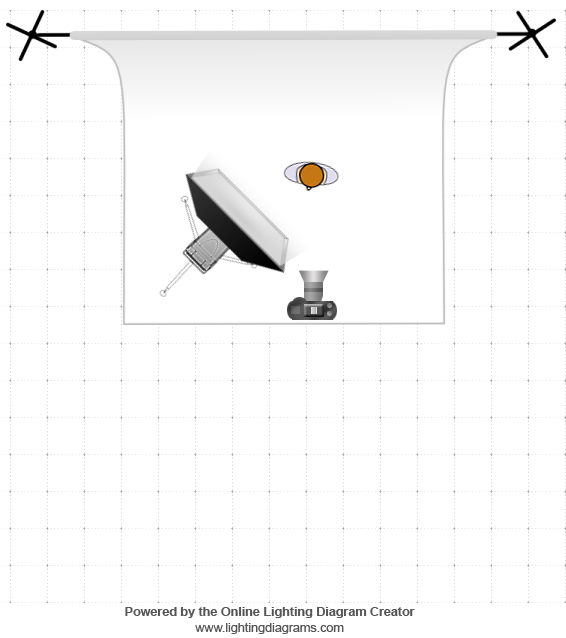
Below you can see the setup that i used. I used a single light source, a strobe with a small reflector, positioned at an angle of about 45 degrees. The lightsource could also have been a window.
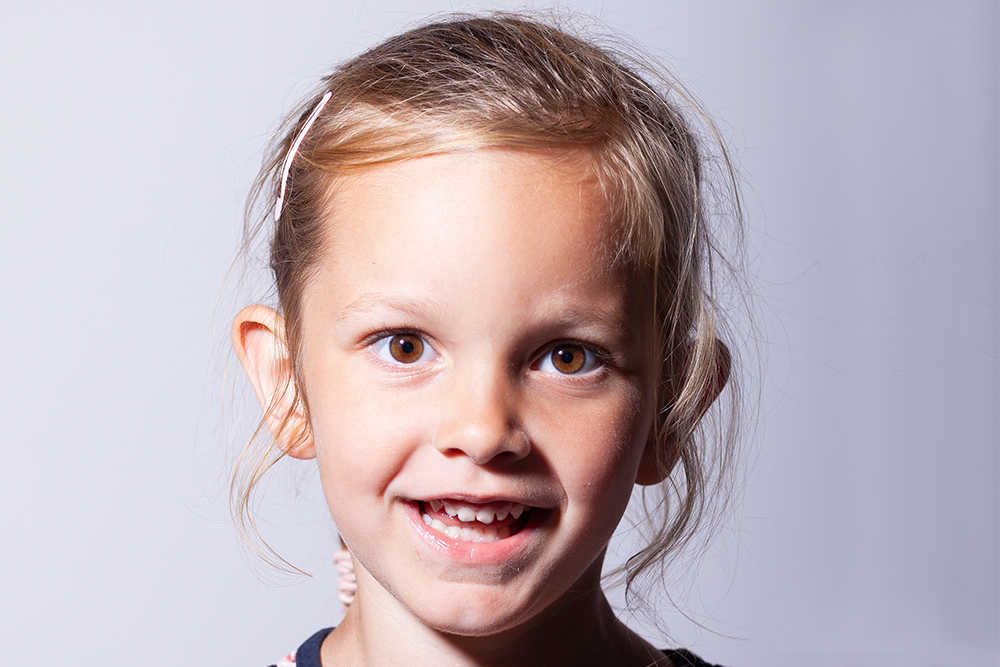
The result:
How can you do this yourself? The advice is becoming dull, but a window is perfect for directing light. Put your model close to a window, vary with the position of your model and you can see the light- and shadowpattern change on the face as you change the position of your model.
By rotating the model, or by looking up or down, you will see the light patterns change and hopefully you will now recognize some of the patterns. As you do this, you will see that there is a very small difference in positioning between Rembrandt and Loop lighting.
Next time we will start with the next series: Basic camera settings.